
Sometimes objects, such as text, show up with white boxes around them, and sometimes colors do not show up on your final product the way you expected.
Here are a few ways to check if a document is going to have issues before you send it off to print.
InDesign
When creating a document in InDesign that includes transparency effects such as shadows, or spot colors, check for overprint issues by going to View Overprint.
When overprint preview is on, items that interact with each other, such as black text over a spot color, will be shown similar to how they will print.
Avoid using spot colors or RGB colors when printing in CMYK. Digital printers often have trouble interpreting and converting spot colors when text, especially text with a drop shadow, is laid over it.
To fix an issue with the text you can change the appearance of black by going to preferences > Appearance of black and turning off overprint.
This may leave a tiny white boarder around the text when printing, so this is not an option that most people choose as darker black text usually looks better with overprint, so let’s look at some other ways to solve the problem first, before trying this.


If you have spot colors in your document try changing them to CMYK. If you have imported objects and don’t know which colors are spot and which are process you can choose to export all colors as CMYK by selecting All Spot colors as Process in ink Manager upon export.

Here is an example of an overprinting issue:

Here we have the dreaded white box around our logo. This issue occurs infrequently and can be an issue with file type compatibility, user setting, or any other number of unexplainable things. This white box will not appear in your PDF, but in printing. The problem here is overprint- I color printed over or subtracted from another. In this case the printer mistakenly thinks that the transparent space around the logo should be blended like an overlay or is a transparent white color. If this occurs check that the space around your logo is truly transparent and not white. If it is transparent then either the file needs to be changed or document settings need to be changed.
Check your transparency and blending mode options. Effects should be turned off, Opacity set to 100% and blending mode normal. See more options in the reference links at the bottom of this article.
If changing your settings does not change the issue then change the way you import your image.
Notice that this logo is a circle. Instead of dropping the PNG file into the document as a square or rectangle, create a circle with the circle frame tool and place it where you want your logo. Then drop the logo image in and resize it so that it fits the entire circle. Now the transparent part of the image object is no longer showing in your document reducing the chance of overprint errors.
Adobe Acrobat Pro
If you have a project that is already exported as A PDF you can check for overprint errors using Adobe Acrobat Pro.
In the menu select Print Production and then Output preview. In the output preview dialog box you can select your printer profile.
Select Simulate Overprint, and show overprinting, then return to your document. Overprinting errors should be visible on the document so that you can see what needs to change in the original file before printing.

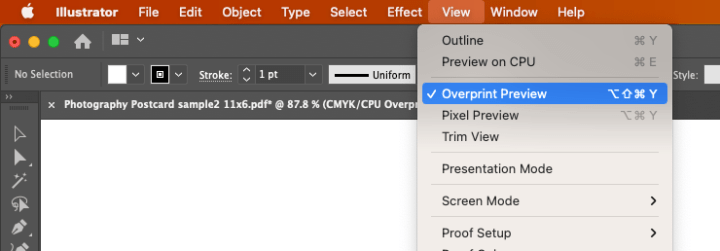
Adobe illustrator
If you are working in Adobe illustrator you can also check for overprinting errors there. Select view and Overprint preview to see colors that will be printed on top of each other.

Photoshop
If none of these options work for you try exporting your project as a PNG. Export your image at 300ppi or better with transparency turned off, or for a cleaner look drop your PDF into Photoshop at 600 ppi, flatten all layers, and reexport without transparency. Then once you have your flattened images drag them back into InDesign and reexport your project as a PDF using only a single PNG layer.
Sometimes white boxes will appear around the text when dropping the PDF into indesign. If this happens this is also a good sign that the PDF was exported incorrectly, and you will have to go back over your preflight check again and check for errors.
A few tip for creating files without errors. . .
If you are having problems with your printer creating boxes around objects try to limit the amount of transparency used.
Avoid using effect modes other than normal when creating objects, and keeping drop shadows and gradient effects to a minimum.

Always check to make sure your project is in the same color space. If your printer is printing in CMYK, then everything in your document should be in CMYK.
Setup a preflight to check your work before exporting.
I hope this information helps you in your creative endeavors and makes the process from your to your printer as smooth as possible.
Happy Printing!
References:
Eliminating the white box effect
https://creativepro.com/eliminating-the-white-box-effect/
Overprinting in InDesign
https://helpx.adobe.com/nz/indesign/using/overprinting.html
Simulate overprint in Acrobat:
https://helpx.adobe.com/acrobat/using/previewing-output-acrobat-pro.html
Simulate overprint in Illustrator:
https://www.printingforless.com/blog/graphic-design/turn-on-overprint-preview-before-printing/
Preflight: